How We Stream 24/7 on Twitch and YouTube
If you haven't seen it yet, we stream our Bible classes 24/7 on YouTube and Twitch. And in this guide I will show you how we achieve this technically.
The Basic Answer
We use a FFmpeg playlists on a Digital Ocean droplet. If this isn't what you want to use, you can bail out now.
This guide will be highly technical and specific to how I accomplished this with our material. Some elements won't be applicable to your set up but hopefully will give you some direction.
1. Setup the Droplet
We use Digital Ocean to create our remote server, but you could do the same setup on any other platform that offers command line abilities to run scripts and install apps and includes enough monthly data transfer to stream 24/7.
Here are the specs:

I was able to use the lowest level Droplet with 512MB RAM and 10GB disk and I've mounted a Volume Storage drive to it for the videos.
2. Upload Your Videos
On your mounted drive, or if you are using a generic hosting platform, create a videos folder and organize the videos how you want to work with them. Here is how we organize them:
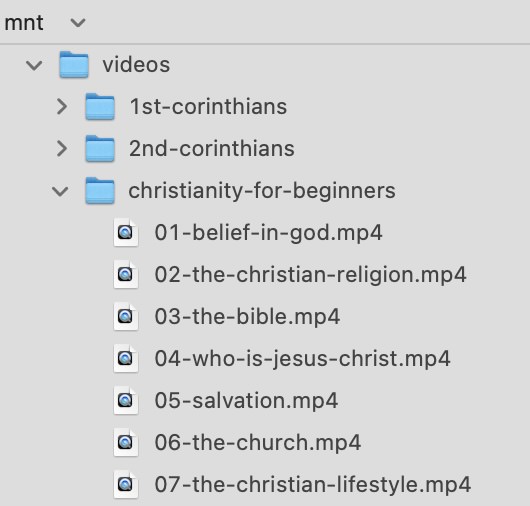
It is all based on slugs and sequence. Our Series have a slug (christianity-for-beginners) then each lesson has a slug with the Item Sequence before it.
This is how our data is stored in our database and will be used when generating playlists and keeping track of where we are in the order of videos.
3. Add FFmpeg
Open up your command line and check if you have ffmpeg already installed:
ffmpeg -version
If you don't, run the following code for Ubuntu setups:
sudo apt update
sudo apt install ffmpeg
You can run the version check again to make sure it is there.
4. Make the Playlist
FFmpeg can run a list of videos based on a playlist. Let's create one. I call the file on our system assets.txt and is located in the root folder. It is very basic and looks something like this:
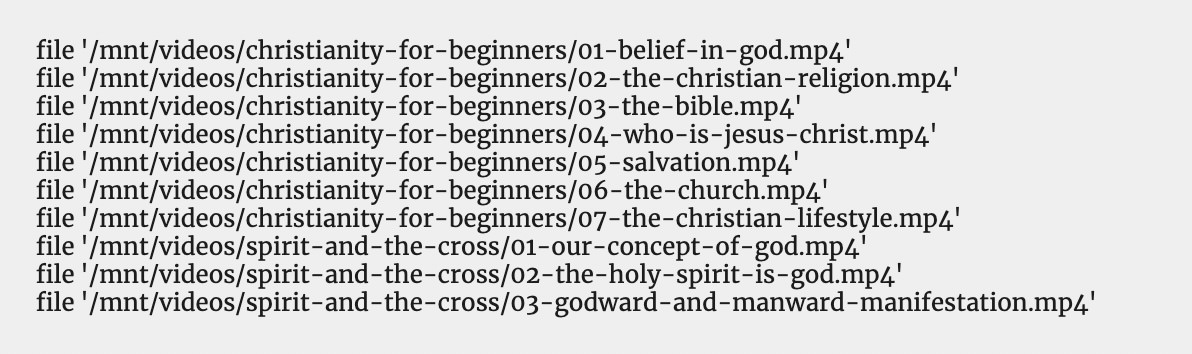
Our full playlist is over 370 videos! Check it out.
In our FFmpeg function later on we will tell FFmpeg to loop, so once it hits the last video it will go back to the beginning. So if your script crashes for whatever reason it will always go back to the beginning of your list.
This is a bonus but to keep it from always going back to the start, I dynamically generate this playlist from our website so if it crashes I know what location we are in the playlist and then reset the order of the playlist dynamically. Here is a brief overview of that process.
I load a database with the item ID and it's start and end time based of the length of the video. I preload this for a couple months and then come back to keep it updated. You could have another script doing this for you.

Before restarting the stream, I ping our website and create the assets.txt in the new updated order and downloads it to the remote Droplet which you will see in the next step.
5. Creating the Script
We will now make a bash script to run from a Cronjob. Here is a graphic of our script.
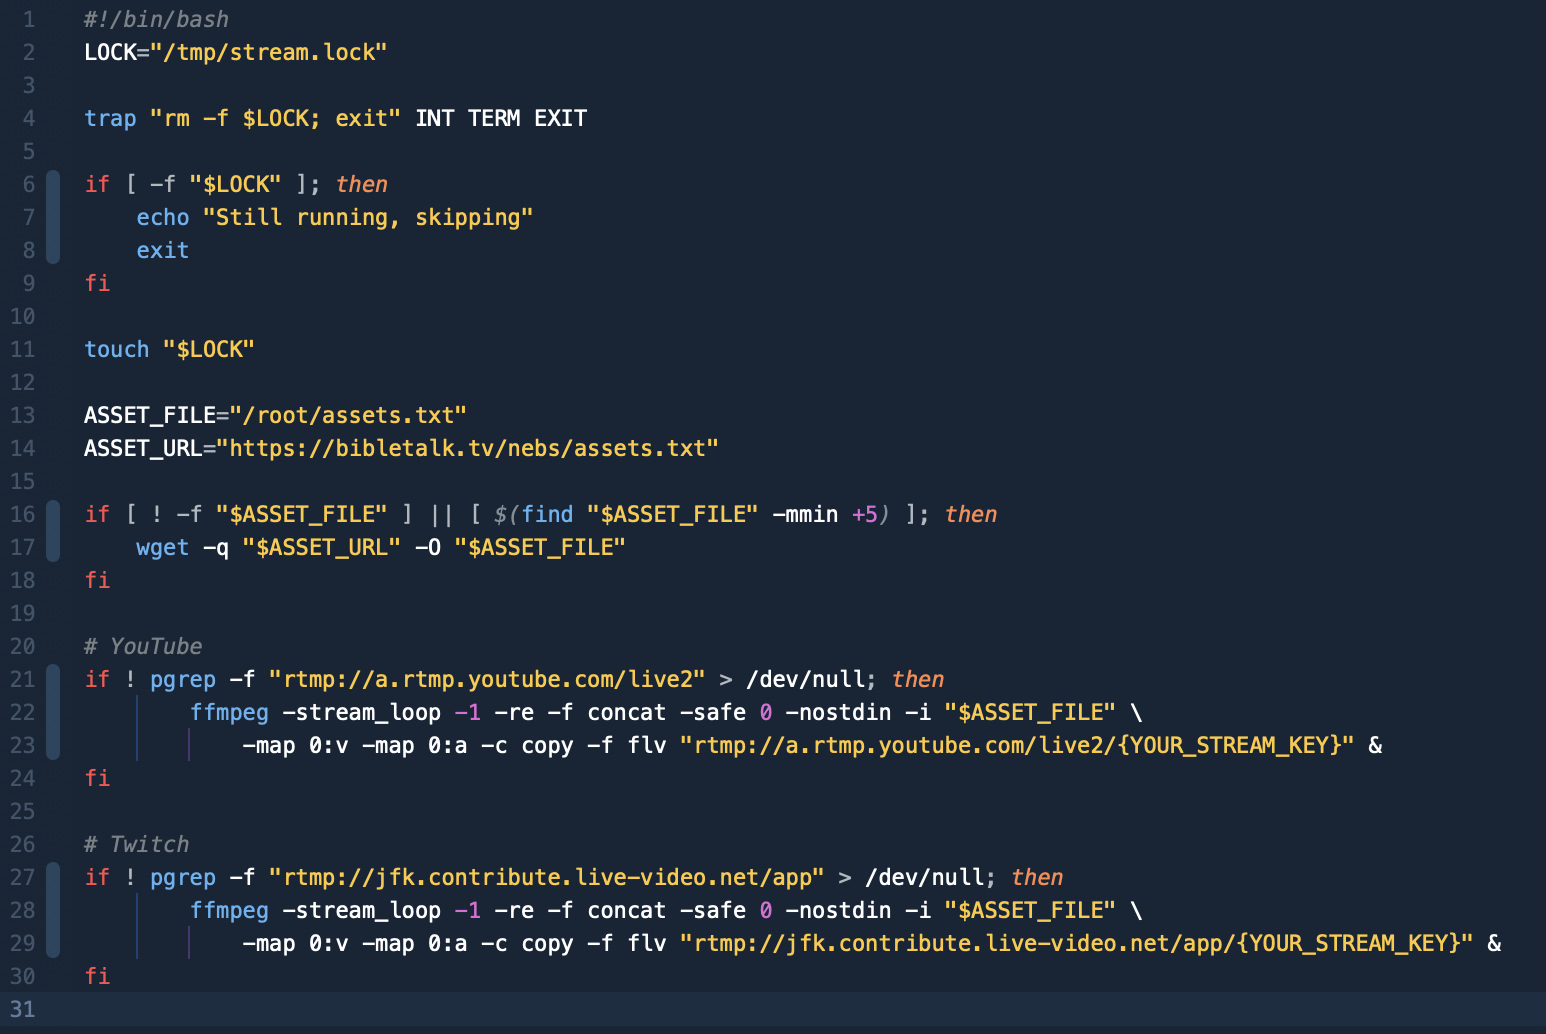
View script as a text file: rerun.txt
Make sure to update the {YOUR_STREAM_KEY} with your actual key. Also you can update the Twitch endpoint to be closer to your servers location. View Twitch Endpoints.
Check the script files above in Text format to see settings I landed on. There are so many options and the FFmpeg documentation is pretty good. You can log errors like in the end of the Twitch script above to see what has gone wrong.
6. Running the Script
To run the script we will be setting up a cron job to handle this. Here is a helpful guide about Cronjobs if you are not familiar.
I have chosen to run the script every minute with the following Cronjob because YouTube's auto end feature seems to end the stream after a minute of no data being sent to them, so it's best to run this often I have found.
* * * * * ./rerun.sh
Closing
I haven't covered every aspect of the process, just some of the key technical parts. You still would need to have knowledge of creating your Live Stream settings in either platform, but this should be a good starting point.
Contact me on X with your questions or issues and I will update this guide as scenarios that are shared.
